30. Dezember 2022
Pomodoro Timer: Prototype, Round 3
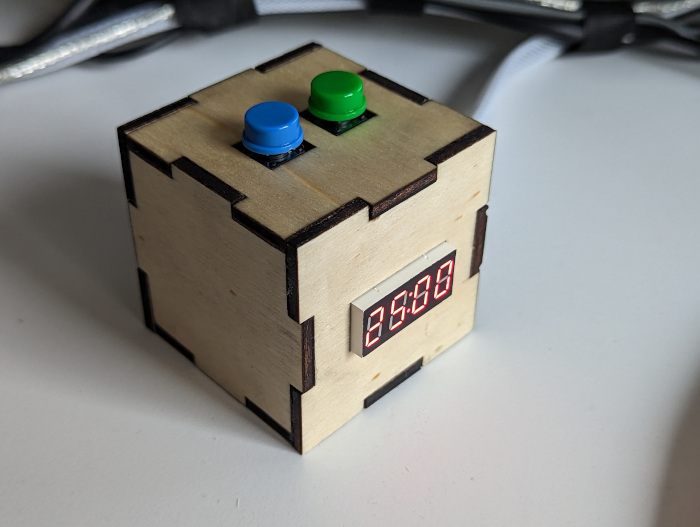
 The “pomodoro technique” is a simple time management method, which requires a robust, simple-to-use timer, which doesn’t distract from the task at hand. For the third version, I constructed a plywood case to house the microcontroller, the 4-digit display, and the two buttons to control the timer.
Never heard about a pomodoro timer? Check out what I wrote in Pomodoro Timer: Prototype with an ATmega32 to understand its purpose. Or look up Pomodoro Technique on Wikipedia.
Previously, I constructed a pomodoro timer based on a TM1637 4-digit display, an Arduino Nano 33 IoT, and a Grove dual button a couple of months ago: Pomodoro Timer: Prototype, Round 2. But whilst the black cardboard case already turned the parts into a usable timer, I wanted something more decorative. Also, I wanted something that I could produce twice (in series). A wooden case would be nice!
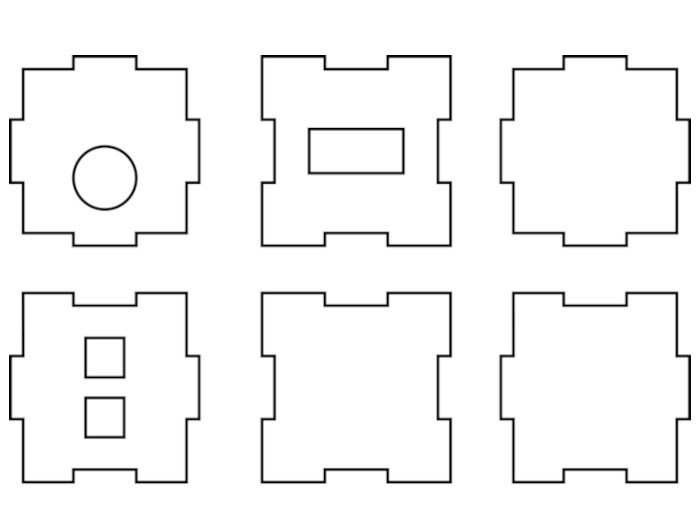
To obtain the parts of the wooden case, I purchased some A4-sized sheets of plywood (0.4mm). I drew the sides of the cube using a vector graphics editor (Inkscape), leaving holes for the 4-digit display, the two buttons, and for the USB cable serving as power supply. I imported the template into Lightburn and cut the plywood with a laser cutter (20W diode laser, 4 mm/sec, 100% power, 1 pass; extrapolated from xTool D1 Pro’s material guide).
To assemble the 6cm cube, I cleaned the plywood, prepared the plywood with sandpaper and wood treatment oil, glued the dual buttons (this was the trickiest bit) to the top side, and glued together all but one sides of the cube such that I am still able to access the inside of the cube. I was able to repeat this another time in order to obtain two Pomodoro timer cubes made of plywood.